
This article will show you how to quickly find duplicate photos with different names and delete them all at once. When it comes to duplicate photos with the same name, it’s possible for you to find them using a default file manager like Finder (macOS) or File Explorer (Windows). For example, Finder’s Find functionality allows you to filter images by format and then sort them by name. You can identify duplicates by name, preview them and select the unwanted ones for deletion. However, what if duplicate photos have different names, especially when the names are wildly different? Please read on to find how to detect and delete them.
Table of Contents
#1 Find duplicate photos with different names on Mac
There are a number of duplicate photo finders available for MacBook Pro, iMac and other Mac computers. Some of them can only identify duplicates by filename. In other words, they are not able to find duplicate photos that are identical in content but different in filename. As a result, they are not helpful in the scenario that we are talking about. So how do we find them?
Considered the best duplicate photo finder Mac by many Mac users, Cisdem Duplicate Finder provides a great solution to meet the need. By default, it will look for and locate true duplicate photos by content, regardless of name. In addition to that, scanning by filename is also provided as a method to find duplicates. The app offers flexibility and lets users take control.
Cisdem Duplicate Finder for Mac is a powerful and easy-to-use app. It supports images of all common formats and allows you to find and delete:
- true duplicate photos with different names.
- true duplicate photos with the same name.
- true duplicate videos, audios, PDFs, Word documents, spreadsheets, ebooks, archives and more, regardless of filename.
- duplicates on Mac, external hard drive, memory card, USB flash drive, etc.

Steps to find duplicate photos with different names
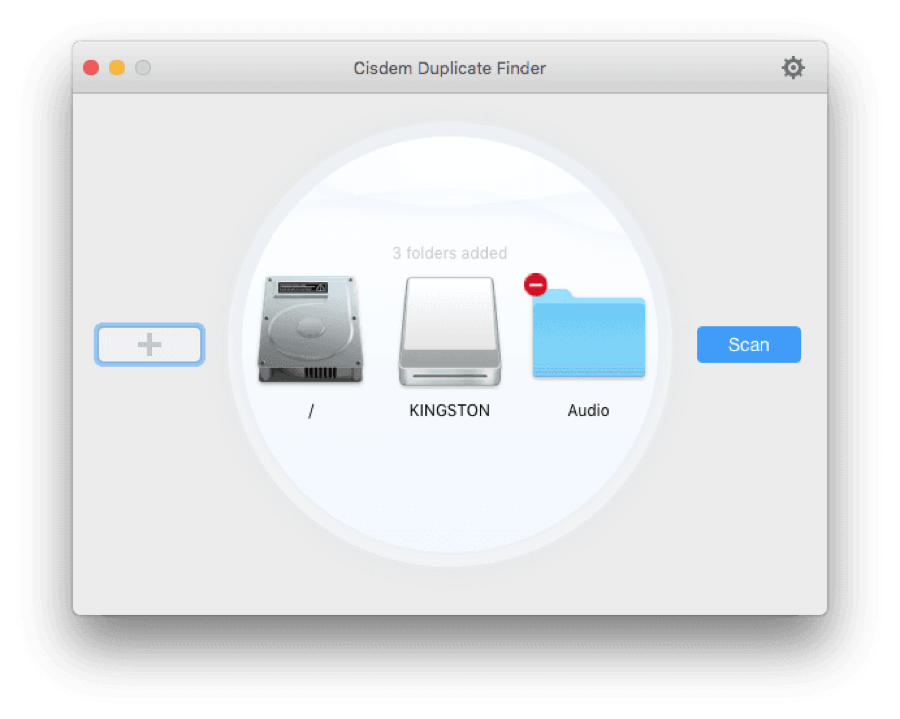
Step 1. Add folders, volumes or drives to scan for duplicates.
Download Cisdem Duplicate Finder from its official website and install the app. Open it. To scan for duplicate photos in a folder or drive, add this folder or drive. To scan for duplicates across multiple locations, add these locations.
To add a location, click the plus icon + on the left of the interface. You can also do it by dragging and dropping.
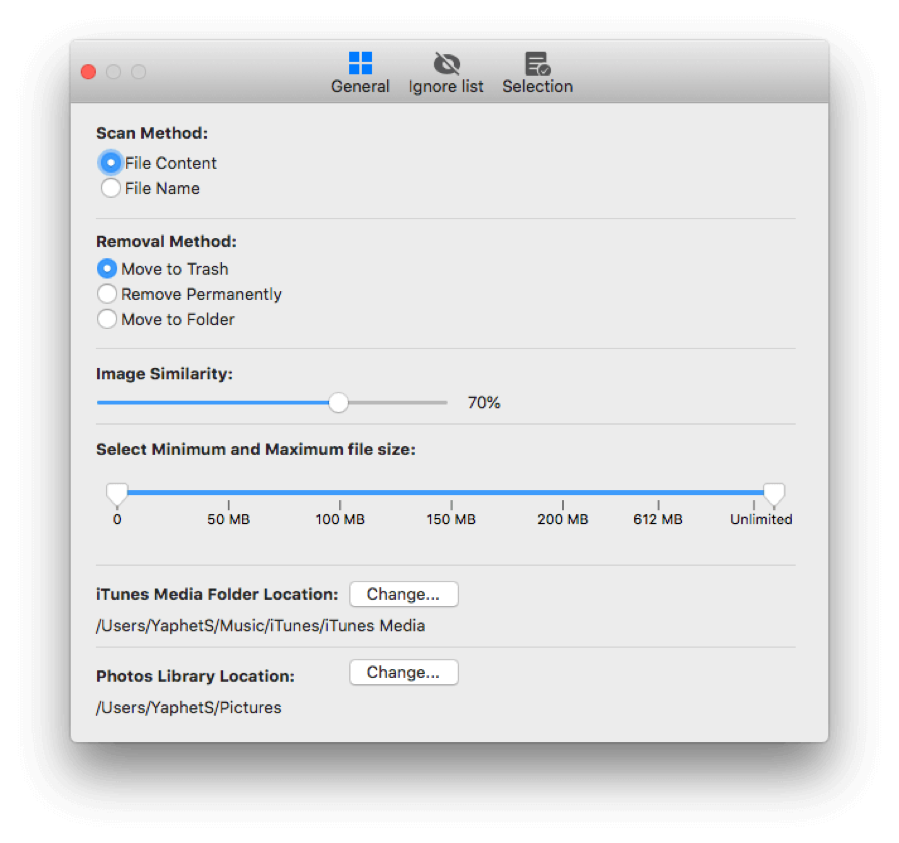
Step 2. Choose the right scan method and configure other settings if needed.
Click the settings icon in the top right corner, which will bring up the settings window. To find duplicate images with different names, make sure File Content is selected as the scan method. It is set that way by default.
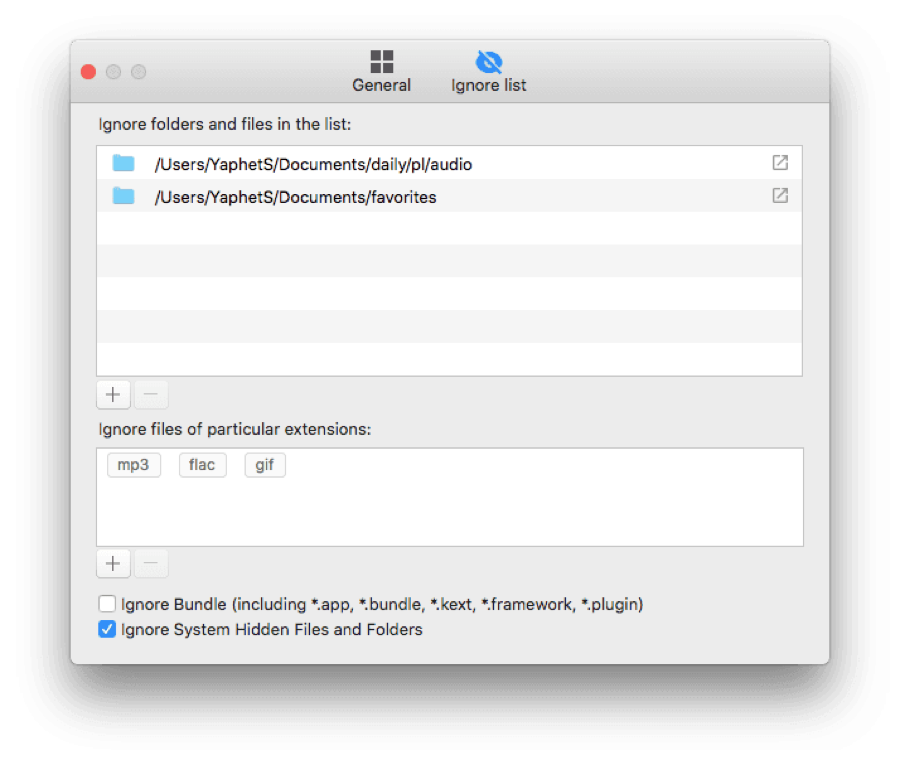
There are also other options in general settings. If you go to the Ignore List tab, you can exclude files, subfolders and folders from scan. This can prevent important photos such as backup from being scanned and deleted (by accident), which may also help reduce the scan time. It’s also easy to set the scan to ignore photos of specific extensions, say, PNG.
When you finish setting up, return to the main window and click the Scan button.
Note: Your custom settings will remain in effect until the next time you make any change. Different duplicates removal needs may require different settings. That being said, the default configurations are fine-tuned for great performance in most cases.
Step 3. View and preview duplicate photos
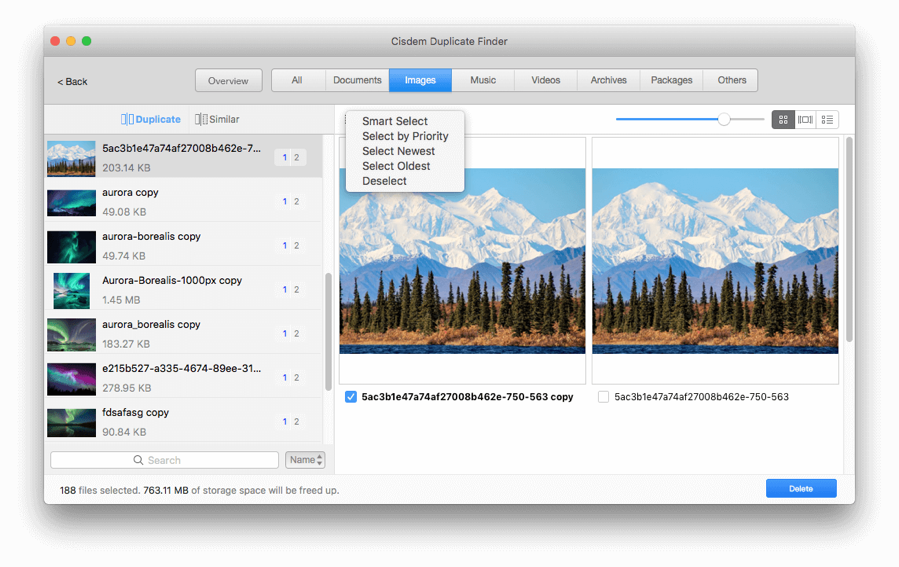
Once the scan is done, the results window will appear. Choose the Images tab. There, you will find a full list of the detected duplicate photos. They are truly identical in content, no matter how they are named.
You can easily sort the results and search files by filename. With the first (default) preview mode, you can conveniently preview and compare pictures side by side. If you switch to the second mode, you can find the path (or location) of a file. The third mode provides more details such as the size and resolution of a photo. You can resize the window and zoom in/out the preview to get better view.

Step 4. Automatically or manually select unwanted duplicates to delete in 1 click.
Duplicate photos appear in groups, which are listed on the left of the results window. In each group, you will only need one photo, and the rest will be selected for elimination. Thanks to Cisdem Duplicate Finder’s Auto-Select feature, they are automatically selected. What if you are not happy with the auto-selection? No worries. This great duplicate photo finder also provides multiple selection rules to meet various needs. To find them, just click the list icon in the top left corner of the preview interface. Also, you can manually unselect or select files.
Click the Delete button to get rid of the undesirable duplicate photos.
Cisdem Duplicate Finder is versatile and user-friendly with simple, intuitive interface. It provides a number of benefits, which make it the best duplicate photo finder for Mac.
- Find duplicate images of almost all image formats including RAW
- Also find duplicate videos, movies, songs, documents, archives, etc.
- Find true duplicates based on content
- Support internal and external storage
- Quickly scan folders and entire hard drives
- Make it easy and high customizable to scan duplicates
- Let you preview photos side by side and zoom in/out preview
- Auto-select duplicates for 1-click removal
- Also offer selection rules for you to choose from
- Easy to use
- Support macOS 10.10 and later
#2 Find duplicate photos with different names on Windows
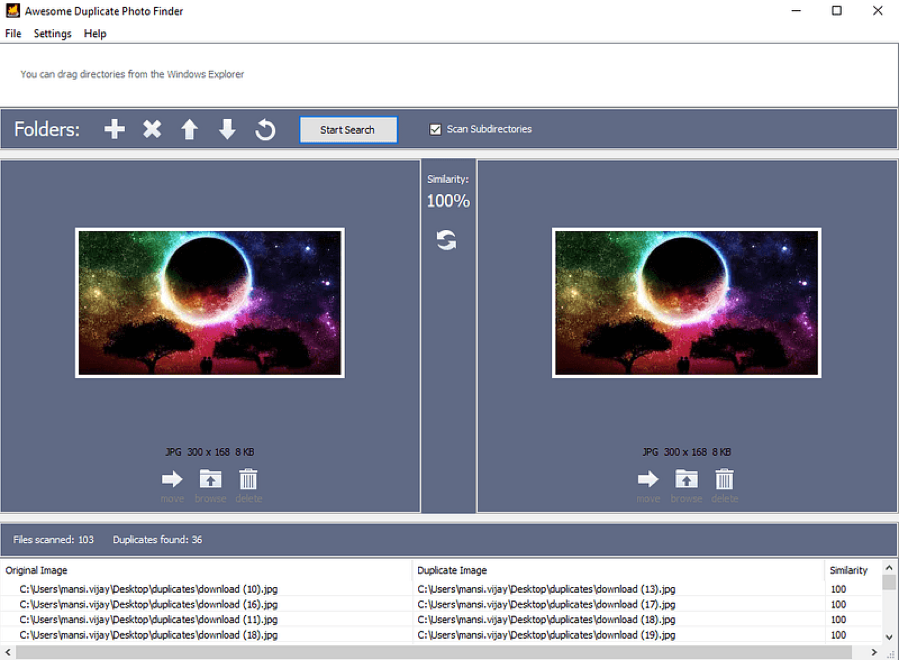
Windows PC users can use Awesome Duplicate Photo Finder to get the job done. This Windows-only app is compatible with Windows 2000 and later, including Windows 10. Unlike Cisdem Duplicate Finder, it only works with image files. But it does a good job of locating duplicate photos different names.
This duplicate photo cleaner can identify true duplicate images no matter what their names are. Note that it currently can only support JPG, BMP, GIF, PNG and TIFF. These are the most common image formats. As a result, this app should have no problem finding most duplicate photos in most cases. Below is how to use it.
Step 1. Add folders or drives to scan for duplicate pictures.
Get the app installed on your computer. Open it. In the main interface, click the plus icon +. In the dialog box that shows up, select a folder or a drive from which you want to remove duplicate photos. In addition to your computer’s internal hard drive, it also supports external storage devices. Click OK. Click the Start Search button in main interface.
Step 2. Sort and preview duplicates.
When it finishes scanning, you will be shown the scan results. Duplicate photos are listed in the lower part of the interface. You can easily sort them with a click. The built-in preview feature lets you preview images without leaving the app. When you select a group of duplicates. The preview will display side by side in the upper part of the interface.
Step 3. Select photos for removal.
Under each preview, there are three icons: Move, Browse and Delete. To eliminate an unwanted duplicate, click the Delete icon. To move it to a folder of your choice, click the Move icon. Currently, there isn’t a feature to batch select items for deletion. So you need to delete them one by one.
Conclusion
It’s possible for photo duplicates to have the same name or different names. If we try to look for them based only on filename, we may miss out certain true duplicates. Cisdem Duplicate Finder can find all duplicate photos based on content. Duplicate photo finder software like this can be most helpful in locating duplicates and freeing up storage space.