Do you have a folder of images and videos that are close to your heart but corrupted? If the answer is yes, then you need to hook on to this article.
Images and videos often get corrupted due to various reasons, one of them is being a virus in your system. A virus tends to destroy the system files and leaves them totally useless.
If your important images and videos have also been destroyed due to a virus, or while moving from one folder to another, then instead of deleting the corrupted images and losing hope to recover them, you can simply use photo recovery software and recover the important images and videos.
This might look like an impossible task, but you can repair photos and videos easily, all you need is reliable software to do the job.
Last month, while moving the images of my cat from my smartphone to the laptop, a few images and videos got corrupted, and I couldn’t afford to lose the only pictures of my dearest cat who expired last year.
To repair those images and videos, I came across Repairit 3.0 which helped me get back my cat’s memories, all thanks to Wondershare.
Today, I’ll be sharing all the necessary details about this amazing software, such as its features, pricing, and setup guide, so without wasting time, let’s straight away jump into the topic.
Table of Contents
What is Repairit 3.0?
In simple words, Repairit 3.0 is an image and video repair software that easily repairs the corrupted files. It allows you to repair images of various extensions such as JPEG, JPG, CR3, CR2, NEF, NRW, RAF, DNG, ARW, GPR.
Furthermore, you can repair videos of extensions such as MOV, MP4, M4V, M2TS, MKV, MTS, 3GP, AVI, FLV, MXF, INSV.
Before saving the files, you can also preview them, therefore, it becomes easier for you to only save those images that are important for you. Repairit 3.0 can be used on both windows as well as macOS.
The product is made by Wondershare, which is also behind the success of Filmora, a popular video editing software for rookies and professionals, therefore, the software is totally reliable and worth it.
What’s new In the Updated Version of Repairit 3.0?
The updated version of Repairit brings a lot of new changes in the user interface, and also introduces photo repair. The new addition to the software helps you to fix images. While the previous version only supported videos, the newer version supports images of various extensions.
The updated user interface is sleeky and easy to use, like before. What makes it different from other photo repairing softwares is the simple UI. There are two options on the main screen now, photo repair and video repair. Choose the one that you need, select th corrupted files that you want to repair, and hit the repair button.
We should now have a look at the features offered by Repairit 3.0.
Features of Repairit 3.0
● Photo Repair
Repair any file format
As aforementioned, repairit 3.0 allows you to repair more than 10 types of image formats, which includes all the common ones like jpeg, png, jpg, etc. You can easily repair all types of images and there’s no need to look out for different software to repair different image formats.
Repair from any device
Once you have installed the software on your system, you can attach flash drives, pen drives, smartphones, and digital cameras as well to your system and repair the corrupted images and videos using Repairit 3.0.
Fix any type of photos
Repairit 3.0 can fix photos with grey areas, pixelated photos, and images that are unable to open. The three-step process will fix any type of damage within a few minutes.
Repair in Batch
You can repair multiple images of different formats together using the repair in batch feature. This helps you to save time and quickly repair images in bulk.
● Video Repair
Repair Corrupted videos
Repairit 3.0 allows you to repair all types of videos, no matter how they got corrupted. You can efficiently repair the videos that got damaged while transferring, recording, editing, or any other way.
Easy to use User Interface
A less interactive and complicated user interface can make it difficult for the user to use the software. Repairit 3.0 has a clean and easy-to-navigate user interface that makes the process of repairing videos and images, simple and faster.
The entire process is just a 3 step work, Add files, repair files and preview them before saving.
Batch Repairing
Repairing one video at a time can be a lengthy task, so why not repair all of them at once? With the Batch video repair feature, you can repair multiple videos at once no matter if all of them do not share the same file format.
Repair high-quality videos
Repairit 3.0 allows you to repair 4k and 8k videos as well, and while repairing, you can check the snippets of the video to check the overall quality of the video. Furthermore, Repairit 3.0 gives you the best success rates as compared to other similar softwares.
Repairit 3.0 Pricing
Repairit comes with a free trial, but you need to purchase a license key to explore the unrestricted version. There are three types of plans, monthly, yearly, and lifetime access plans.
The monthly license costs around $39.99, giving you access to photo repair as well as video repair. All of the features are unlocked in this plan.
The next one is a yearly subscription, which has all the features unlocked and billed at $49.99. You can cancel these two plans anytime you want to. The last one is the annual plan, which is billed at $69.99 for a lifetime.
You can also purchase video repair and photo repair separately, the plans and pricing are similar.
How to Get Started with Repairit 3.0?
Using Repairit 3.0 is easy. All you need to do is download the software for your system, you can use these links to download the latest version:
- Download the software on your PC, and install it. Now double click on the icon to launch it, and move forward to the next step.
- If you cannot find the shortcut on the desktop, use the search bar or start menu to find it.
Repairing videos and images:
- The entire process is pretty easy:
a. Firstly, locate the folder where you have stored the corrupted images and videos, select the folder/video/image.
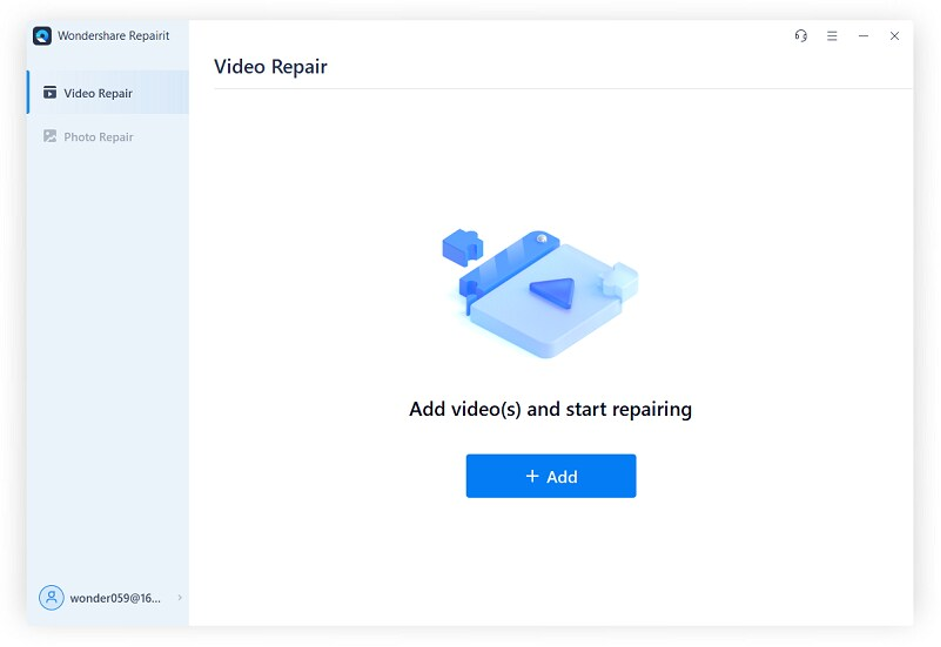
b. Now click on the repair video button on the bottom right of the screen. Repairit 3.0 will start the process and the preview window will open.
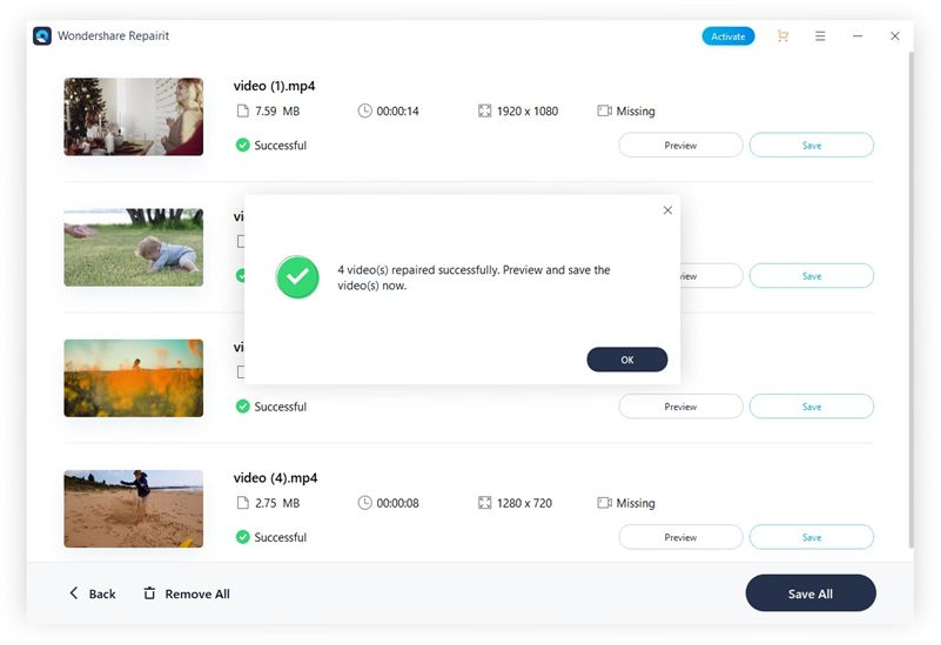
c. You can now preview the repaired files and save them on your desktop.
2. Advance Repairing mode
This repairing mode shall be used when the image or video file is severely damaged and fails to recover in normal recovery mode.
1) Click on the advanced repair option on an unrepaired video.
2) Now click on the folder icon and add a sample video, the advanced repair uses a sample video as a reference to fix the corrupted video file.
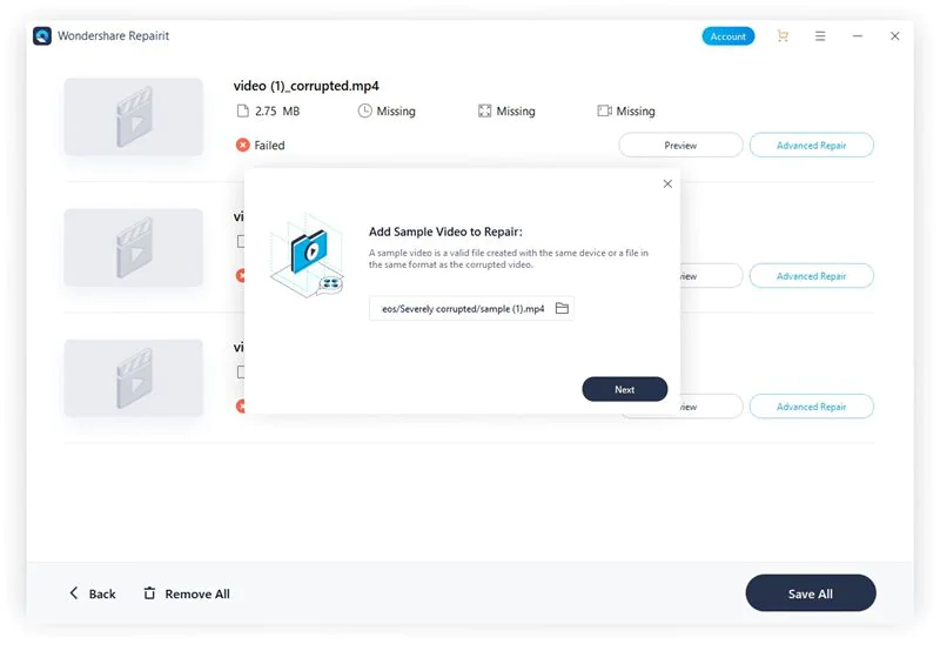
3) The software will check whether the corrupted video/image can be repaired or not, once it is checked, you will see the repair button.
4) After the video/image is successfully repaired, you can save it on your system.
That’s how you can easily repair the corrupted images and videos using Repairit 3.0.
Wrapping Up
After reading this guide, you will never find difficulty in repairing a corrupted photo or video. We explained the step-by-step process to repair files with Repairit 3.0, along with its features and pricing.
You can use it on windows as well as the macOS system, and purchase a lifetime subscription to save annual license charges.